Showing posts with label Rosewood stamps. Show all posts

Wednesday, April 27, 2011

Happy Birthday Donna

Donna's birthday was last week. We had cake and flowers and of course cards. I made this card to celebrate her special day.


The flower stamp is from Inkadinkdoo that I stamped with Memento Black and coloured with 2 Tria Markers. I added the shadow behind the flowers with Copic Cool Shadow. The sentiment is from a clear Hero Arts set. I'm not sure if you can really see it (I hate scans for poor photos!) but the brown is a new paper to our store. It comes in a variety of colours and adds a beautiful shimmer to any card. Coincidently it is called Shimmer paper. Call us if you are interested. The layers were cut with Label 17, I think.


I didn't get a photo of the inside but I stamped a Whipper Snapper Chicken holding presents that I coloured with my beautiful markers. The base card was stamped repeatedly with Vintage photo and a gift box stamp from Rosewood. I created a pop-card with the chicken stamp that a scan would not have done justice. I was trying for a bit of humour. The outside of the card looked so prim and proper but the inside was meant to be fun. Not at all like Donna herself, she is all fun all the time. One of the kindest people I know.

Saturday, January 8, 2011

October Challenge - con't

Darlene must have jumped all over this one...no pun intended. She headed to the grocery store and picked up brown paper lunch bags. She cut ears, stamped Rosewood Easter Eggs across the bottom and coloured them. Next she added googlie eyes, drew on a mouth, fluff nose & fishing line whiskers. The tag is Rosewood Flourish Easter Egg stamped on shiny gold card stock. This cute little bag could be made in any size to deliver gifts from the Easter bunny or they would make great favour bags for a children's party.


Lauralee's bag is as usual a work of art. She stamped the Hero Arts background stamp in brown ink, coloured in the hearts with a red Marvy marker and highlighted the image with a white gel pen. She used a Nestibility to cut the heart shape in the bag and then lined the bag with some beautiful hand made paper. Walnut Distress ink on the edges of the bag adds dimension. Lauralee created her tag with the same heart shaped Nestibility in white card stock. She attached the cut shape from the bag to complete her tag. A twine bow, some walnut distress ink and raffia make an adorable bag & tag combination.


Cassie had brightly coloured bags to work with. She used a coordinating stamp and punch set from Stampin' Up to create the butterflies which she coloured with chalk. Her tag was a die cut that she stamped with Rosewood Paper Swirl and coloured with Bic Mark-Its. Cassie stamped Rosewood Friend on scrap paper, trimmed it out and dragged the edges with the red Mark-It to pull it all together.


Barb's card was layered onto a cream coloured card that she distress with olive pigment ink. The brown card stock was passed the CB folder swirls. She stamped Rosewood Northern Pine which she cut in half and layered onto green card stock. She used the same sentiment on her bag. Barb also created a similar layered image on the reverse of her bag. I apologize for the lack of a photo for the reverse of Barb's bag.


Barb had a fantastic interpretation of this challenge. She created her bag from newspaper based on instructions she found here. She did tell me that she made the bag a size bigger than the instruction make. I'm not sure where the sentiment is from but she created a great focal point by setting the brown mat off centre. The tag was created using her Cricuit "A Child's Year" cartridge. Don't you just love that shape?


Tuesday, December 21, 2010

Survey Ended

Thank you to everyone who took the time to respond to the poll. The results showed what I expected but the decision to develop the idea further will be made early in 2011.


A slight change of pace from holiday cards, but this could be easily be made into one by changing the sentiment. The Rosewood Bittersweet Wreath is stamped twice and embossed with copper. Red stickles were added to highlight the berries. Rosewood Happy Birthday (this one is #F160) is stamped and embossed with gold. The stamped piece has the bottom edge torn and layered onto olive cardstock that has been torn to loosely replicate the edge on the stamped piece. The base card is stamped with Rosewood Leaf Detailed and embossed in copper.

Wednesday, December 15, 2010

I struggle with ribbon. Yes I admit it. I love the look but usually get so frustrated because it never looks the way I envision it in my mind. I saw this card on another blog and thought wow, I can do this with what I have. The stamp is Rosewood Winter Cardinal stamped in Memento and coloured with Copics. The mint green cardstock went through a Sizzix folder. I distressed the stamped image with Scattered Straw and Vintage Photo. (side note: I have discovered that I prefer the foam pads to the felt pads for distressing and although the make-up sponges are readily available and inexpensive, they don't work as well as I would like.) I used Nestibility Label 8 to cut the the image and the layering mat. A piece of ribbon and I am done.


I screwed up cutting the stamped image on the next card but it still works. I did discover that I had to shift the stamped image to the edge of the card instead of the embossed layering mat. I'm not thrilled with the bow on this card but still pretty. One slight difference with this card. I used Core'dinations paper for the embossed layer. After running the paper through the Sizzix folder I used an emery board to scrub off some of the top layer of paper. So pretty.


Tuesday, November 30, 2010

Holiday Hours

The store will be open Sundays until the end of December.

12:00 p.m. - 4:00 p.m.


You still have time to create one of a kind cards. Drop by and visit for supplies or inspiration.


This is an example of blissfully quick and easy card, using just the wave stamp set, Snowy Wave. Just align on your block; ink with appropriate colours, some colour if desired and a bit of sparkle. Layer the stamped image onto blue card stock and apply to a red base card. Quick and easy your cards are done.

Tuesday, November 16, 2010

Yellow Roses


Donna was asked to make a set of cards for a lady that volunteers at the local community centre. She wanted thank you and birthday cards to give to her sorority sisters. If I understood correctly the sorority was represented by a yellow rose. Donna isn't a big fan of custom orders but created four cards that should fit the bill. The Rosewood Rose Spray was stamped and water coloured with markers. She added a bit of glitter and punched a decorative border on the bottom edge of the stamped image. The green layering mat was passed through the CB swirls folder and it was all layered onto a white base. I'm not sure who the "thank you" stamp is from but I think Donna did a great job.

Monday, September 27, 2010

New Designs from Rosewood

The new designs from Rosewood stamp are being added to the Frog's Whiskers Ink website. We are currently taking pre-orders and hope to begin production next week. Victorian charm is very evident in this collection, including a charming group of carolers, a lamp post and a street that will remind you an old fashion village Charles Dickens may have written about. If Victorian isn't your style the stamp Birch & Stream (L746)
or Candles and Holly (L740) may catch your attention. I am looking forward to see what Rose-Marie has in mind for this collection.

Sunday, September 12, 2010

Getting back to the routine

The girls have started school again and I am back working in the store. The same routines as in years past but with a twist this year, our oldest is in first year college locally. Her classes are varied through the week and I haven't figured out yet when she will be going or coming. The younger 2 are same old, same old on the bus about 8 and home about 4. Heading back to work for me is always a bit of a learning curve. Things always change at the store over the summer and it usually takes me a few days to familiarize myself again. The first week back is always tiring for all of us but next week will be better.

Back to stamping! One of Frog's Whiskers Ink retail store owners sent us this stunning card made with Rosewood Father Christmas.


This photo does absolutely no justice to how rich the colour is in this card. The image was stamped twice, once embossed in gold. I don't know precisely what she used to colour this card but I am guessing Tombow markers. The tree has been adorned with Flower Soft. She cut out the legs and centre chest from the embossed image and then popped the embossed image over the bottom coloured image. Glitter was added and then the layered image was matted onto the olive green base card. Mimi a la carte is a store in Montreal, QC. If you have a few minutes visit her website here to view more of her work. Just remember to translate as she is French Canadian.

Friday, August 20, 2010

June Card Challenge - Continued


I thought I had better finish posting the June challenge cards before I get the August challenge cards in my hand. Geesh, I can get behind in a hurry!

Jess' card makes great use of some beautiful vellum we had stashed. She cut the shapes with Nestibility dies and layered them onto the base. In hindsight and with a bit more time, we should have added another element in the bottom right corner. Jess is a teenager and pulled this card together the night before the cards were due. Sigh, like most of her homework....


This is the first visualization I had for this challenge. The minute I saw the sketch I thought of a tri-fold hold. In my mind I thought it would work but then I started second guessing the design and made the second card shown. I used a Nestibility die to cut the hearts, MS butterfly punch, a Fiskars heart punch and some dollar store bling. The bling by the way was gorgeous in the package but was somewhat challenging to apply neatly to the card.


The second card is a gate fold card that uses a bunch of different papers to make up the layered hearts. This card seemed to demand a tone on tone colour palette and I am sure you will notice the slightly squished bling and the nip out of the corner of the heart. Yes, I messed it up a bit but it serve as a reference for me. The other girls got nearly perfect cards.


Barb has used her Cricuit to full advantage for this card. Every time I see her cards I think about making the leap to ownership a little more. She added some bling and used some of her paper stash to complete this card. A beautiful card.


Barb made this bonus card, using her Sesame Street Cricuit cartridge. Who doesn't love the Cookie Monster. A really cute card that completes the elements of the sketch.


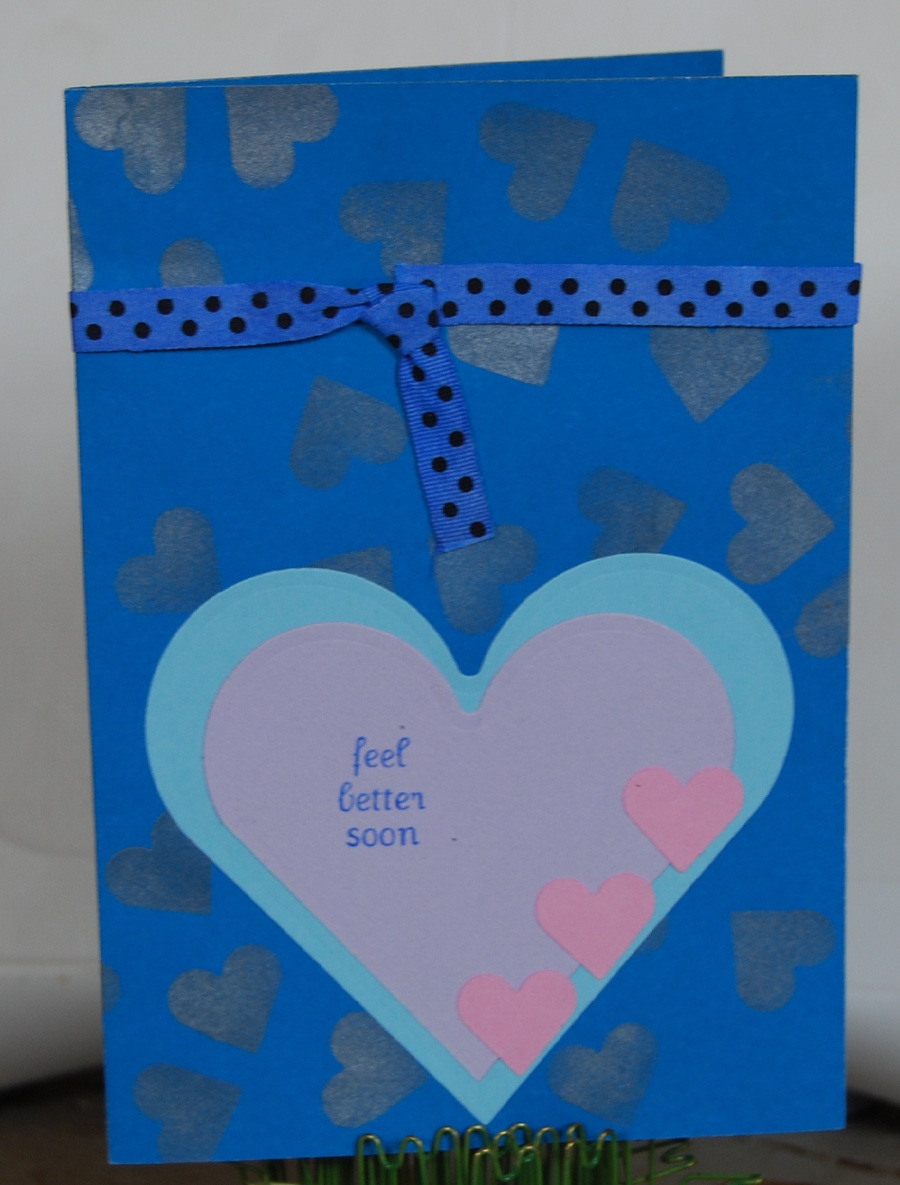
Cassie's card replicated the challenge sketch almost perfectly. She stamped a Rosewood heart with Brilliance (for shimmer). The Nestibility hearts were given a good work out for this challenge. Since Cassie chose to position the hearts near the bottom of the card, the addition of ribbon was necessary. We don't own that much ribbon so Cassie took a white polka dotted ribbon and coloured it with a Bic Mark It, instantly co-ordinating ribbon.

Jacqui's card was absolutley stunning. She used a beautiful Magenta stamp for her central image., which she had purchased the previous month after play day. Then she used her Cricuit to cut a little blue bird, the branch and the word "love". (I love that script!). A perfect card stock for the base, some ribbon and she layered the images to create this wonderful card.


Thursday, August 5, 2010

June Challenge

I have my "stuff" together...finally and I pleased to share with you the June Challenge cards.

Just to refresh your memory, this was the sketch Cassie chose for our challenge card but she stipulated that the cards must have blue on it. Cassie loves blue!


Lauralee really had fun with this challenge and sent 3 cards for the challenge.


These 2 cards cards are quite simliar. The flourishes Lauralee used are so beautiful. The hearts are flaps that contain sentiments and are topped with Lauralee's favourite MS butterfly punch, which are stamped and embellished with pearls.

For her last card, she took a slightly different path but still has all the elements.


This card contains a sassy sentiment that is perfect for the cover of the card. And who doesn't love puppies?

Below is the card Donna created. She stamped a Rosewood stamp (K20 Hearts & Flowers) in blue, cut off the top flourish and coloured the flowers. She stamped a flourish on the background and ran it through CB Swiss dots. She popped the stamped image over the flourish and tucked a MS punched butterfly underneath. A beautiful piece of ribbon, completed the challenge.


Darlene's card (below)has a entirely unique take on the challenge. The sarcophagus is a Cricuit cartridge and the coins I suspect are left over from one of her belly dancing costumes. Darlene has stamped and embossed a gold flourish on the base card and layered the cricuit die on top. She also added the ribbon element from the original sketch.


Tomorrow (hopefully) I will get the rest of the cards from the June challenge posted. I will also check to see if I have better information about the what stamps the ladies used in their cards.

Wednesday, June 30, 2010

Happy Canada Day


I am proud to be Canadian and equally as proud of this great country. Sometimes we make gaffs but Canada is a great place to live.

Happy Canada Day
to you all.


Donna drew the short straw and will be minding the store from 12 until 4. Drop by and say hello.


(Rosewood Stamp C72)

Friday, June 4, 2010

Butterflies In Resist

Today I have the last of the cards Lauralee did for Kitchener. These cards use a resist technique that can be adapted a number of different ways but still get the same gorgeous look.

Here are the cards:


And here are Lauralee's instructions in her words but cleaned up a bit:


Use up any ugly scrap designer paper (you don’t see much of it as the design shows up very faintly so it’s a great chance to use that butt-ugly stuff you have tucked away – come ‘on, I know you have some too!!!) (Using a magazine page works great for this too)

Stamp Rosewood Music Background on the butt ugly designer paper(BUDP) with black ink – clear emboss.

Using Versmark ink, stamp the butterflies randomly on top of the music note and clear emboss (Inkadinkadoo stamp – Donna gave it to me and I gave it back to her since she couldn’t find it again to reorder. I found it in clear rubber with a bunch of other butterfly images and cut mine up so I had six single butterflies instead of one long stream of them all attached. I’m such a rebel!)

I took Distress Ink – Broken China and rubbed it all over the top, paying special attention to the sides so the edges were darker. The green was shabby shutters but was too light and you can’t make out the outline of the butterflies.

Take a Kleenex and rub off the butterflies as they will have Broken China ink on them. They will buff up nicely.

I used black bazzill paper as the background layer.

I used a smaller piece of BUDP and a Nestabilities for greeting – edged the sides with ink and then stamped the sentiment on it (I think it’s from Stampin Up). Then the tricky part – I laid the whole small label in the versamark pad and covered the whole label with versamark ink. Then I clear embossed the whole thing – it makes it really shiny and stiff. Backed it with another bazzill piece that I ran through the bigger Nestability die.

I stamped a small scrap of white paper with the music note stamp and clear embossed it. Then I used the Martha Stewart butterfly punch (LOVE LOVE IT!). Inked little butterfly with the Distress ink and put two little rhinestones on it

Distressed the edges of the music note panel and card stock base with the Distress Tool.

DONE! Phew!! That was too much work.

Thank you again to Lauralee for helping Tom & Rose-Marie at the Kitchener show and for allowing me to post all of her beautiful cards. Check out Lauralee's blog here. She always got something entertaining to share.

Monday, May 31, 2010

Sunflowers & Buttons

After reading on the Simplicity blog about her adventures with buttons, I came across this card Rose-Marie created. Sorry about the washed out image, in person the colours are much nicer.


The background was stamped with Rosewood French Script and run through the CB Swirls folder. The Rosewood Sunflower Script was stamped, the image coloured as desired and the background distressed. Centre the piece of ribbon, layer onto green cardstock base and add the stamped sunflower image as shown. Dig into that glorious button collection to find appropriate size button for sunflower centres. Add more buttons to the ribbon if desired.

Monday, May 24, 2010

Barn Board Not Just a Background

Rosewood Barnboard is featured in these cards from Lauralee.


So I lied, Barnboard makes a great background. Lauralee stamped with brown Distress Inks and quickly dipped the image in clear embossing powder. The Rosewood Daisy Head was stamped and embossed in white on scrap white. Gold glitter glue as added to create the flower centres. The leaves (sorry stamp unknown) was stamped with green distress inks and embossed with clear on scrap. Both the flower and the leaves were then cut and attached to the card. Unknown sentiment, stamped directly on the Barnboard image.


Lauralee created a gorgeous background technique by cutting the stamped Barnboard into strips and then attaching them to a base card either as "shakes" or board, as shown here....


I think the butterfly is a digital image from Hero Arts...beautiful! The "boards" are attached with brads. The Rosewood Friend is on the card in the foreground. A decorative edge was punched, a bit of ribbon and the card is done. Donna told me how Lauralee got the embossing just on the tips of the butterfly wings but I have completely forgotten. I will get in touch with Lauralee next week to find out.

UPDATE - Lauralee posted instructions for these cards on her blog. Making those butterfly wings pop is really a simple technique

Wednesday, May 19, 2010

More Rosewood

These 2 cards are more from Lauralee's creative endeavours for ScrapFest Kitchener. These use the Rosewood Chicken Wire stamp. In the first card, Lauralee stamped the Rosewood Ivy & Flower. Then she stamped and embossed the Chicken Wire in silver. Some twine and a metal tag finish the really lovely card.


This card is one of my personal favourites. I have always liked the Larry stamps and Lauralee created a really funny card using Rosewood Hello Larry. She created the hole by masking a central point in card. The Chicken Wire was stamped and embossed. Distress Inks were used to dragged across the bottom to create the barn floor. The side panels are scrap strips of brown, run through an embossing folder for texture. Rosewood Hello Larry was stamped on a scrap piece, coloured, cut and popped onto the base card. Lauralee chose to trim off Larry's arm for this card. And Larry's escape is complete.


Tuesday, May 18, 2010

Today's Flower - Daisy

The Rosewood Daisy Head is a cute little stamp that can be used a number of different ways. Lauralee created these cards to demonstrate the versatility of the stamp.

This card shows the image stamped across the bottom of the card. Coloured and trimmed to create a decorative edge. Lauralee then scored the card just above the stamped images and slightly below the fold for dimension. I believe the sentiment is from Papertrey Ink. Gems and ribbon were added to complete the card.


This card uses the Rosewood Daisy Head and Wildflowers to create the central image. The Daisy Head was stamped and embossed in white and inked to add colour. The images were cut out and gems added. The Wildflowers were stamped with 2 colours of green for interest. The pool of green at the bottom of the Wildflower image anchors the image on the card. The Daisy Heads were added and the card was distress with a soft yellow ink. I don't know who this sentiment is from.


The card with the orange ribbon shows a similar technique the to first card I've shown. The card on the right shows the Daisy Head stamped in lines across the card; coloured and a black gems added to finish. I don't know who this sentiment if from either. Lauralee uses a corner rounder on many of her cards. It adds a little something from the traditional square cards. A wrap of black ribbon and you are done.


I have also used the Daisy Head to create an all over background with a soft coloured ink.

Monday, May 17, 2010

A Few Last Dandelions

These are the last few cards that Lauralee created with the Rosewood Dandelion.

This first card has the dandelions stamped and embossed with white. Yellow ink was added to highlight the stamped imaged. I believe the sentiment is Hero Arts stamped in red. The corners were rounded and the stamped images were layered onto red cardstock. A couple of red brad and a wrap of red ribbon complete this beautiful card.


Close-up of same card. This photo really shows how much the addition of the yellow makes the dandelions pop off the card.


This card is so elegant. The dandelion was stamped and embossed in white. A scrap piece of white cardstock was punched to create an scallop edged layer. The addition of the red ribbon creates a classic layout. Sorry, once again I don't know who the sentiment is from.


Next post....daisies

Sunday, May 16, 2010

More Dandelions

These cards by Lauralee are slightly different than the ones I shared here in the previous post. It does however show the versatility of the Rosewood Dandelion stamp.


The image was stamped and embossed in white on the reverse side of the vellum and highlighted with white ink. I don't know who the sentiment is from but it also is stamped and embossed in white. The vellum was layered onto the base card and some sewing store pearls added to accent the corners.


For this card, Lauralee stamped and embossed the image in white on the base card. She layered a piece of vellum over the stamped images and wrapped it with coordinating ribbon. A very simple yet elegant card.


These 2 cards show similar layouts to today's cards and yesterday's cards. The green card is stamped and embossed on the reverse of the acetate (both images are Rosewood stamps). A bit of coordinating ribbon and you are done. The blue card uses the same technique as the red (pink?) card above. The scarf yarn adds a nice fluffy look to the card. The faux stitching was created with a white Uniball pen. Sorry I don't know the origin of the sentiment of this card either.

Saturday, May 15, 2010

A New Blogger

The most talented Lauralee has taken a leap of faith and created her own blog. She is just getting started but stop by and take a look here. The timing for the launch of Lauralee's blog is perfect. She sent Donna an album full of her samples from the Kitchener show that I will be sharing with you over the next few posts.

Lauralee was kind enough to help out Tom & Donna while they were in Kitchener. In Lauralee's conversations with Rose-Marie, Rose-Marie asked to her to create cards that would showcase the Rosewood Dandelion stamp. These are just the beginning of what she created.


The dandelion was stamped and embossed on acetate and the image was mirrored on the base card in a plum ink. The sentiment is also a Rosewood stamp that Lauralee has purchased as a cling mount and cut apart to make 2 images. A coordinating ribbon was added to complete the card.


This is basically the same card but she chose not to add the mirrored image on the base of the card.

Saturday, May 1, 2010

April Challenge Cards

The April Challenge was selected by Darlene this month shown here.
These sketches are really challenging for us.

Barb asked if she could join our challenges and this is the card she created. Barb has a Cricuit and used it to cut the images as well as the word "love" which she cut and layered to give dimension. My photo really doesn't do Barb's card justice.


It was Jess' turn to participate in the challenge this month and she made this rather quick card. The bows are from dollar store hair ribbons as is the bling. The sentiment is Inkadinkadoo stamped on a Spellbinder tag which was popped onto the base card.


Laurilee's card was beautiful as always, although she said this challenge was really difficult for her. She cut the 3 scalloped circles with a punch and ran it through Swiss Dots Cuttlebug folder and layered onto some gorgeous Bo Bunny paper. Then she used the Martha Stewart butterfly (her favourite punch all time the note says) from the same paper and added glitter. Co-ordinating ribbon was attached under the punched strip. The tag is a Nestibility stamped with a sentiment from Papertrey Ink and edged with Martha Steward pink ink. Laurilee always send great instructions with her cards.


The front of my card was embossed with the Sizzix Floral Flourish folder. The images from Inkadinkadoo Round Frames set were stamped 6 times; one set was cut out and popped over the bottom 3 images. The edges dragged with Memories Midnight blue and layered onto blue cardstock.


Darlene's card this month is quite different from her previous cards. The images are cut from her Cricuit and embossed with gold. She also embossed the edges of the green paper she used underneath the images. The stamped sentiment is Rosewood stamps also embossed in gold. Darlene used the most interesting wood grained paper layered onto her white base card. I will have to ask her exactly how she did the embossing on this card when I see her next.


The card Donna finally settled on turned out beautifully. She cut the butterflies from a Spellbinder Shapeability. She layered them onto the brown ribbon and added dollar store bling. The sentiment is Hero Arts.


Cassie decided she wanted to make this challenge as well. Her card made use of a Martha Stewart edge punch and a Spellbinder Nestibility Scalloped Cicle. She alternated the circles over a piece of ribbon and added a sticker to the centre circle.


I guess I will have to show the results of next month challenge brought to us by Laurilee in 2 posts next month. If you would like to join our challenge, let me know and I will let you know where to send your images. I will post the May challenge tomorrow.